Bulk Stock Update From CSV |
Top Previous Next |
Stock & Price list Import
Import or export any data via CSV / XLSX to make bulk updates or data changes.
Go to Stock > Stock Extra and select Price-list Import / Stock Update (CSV/XLSX) .
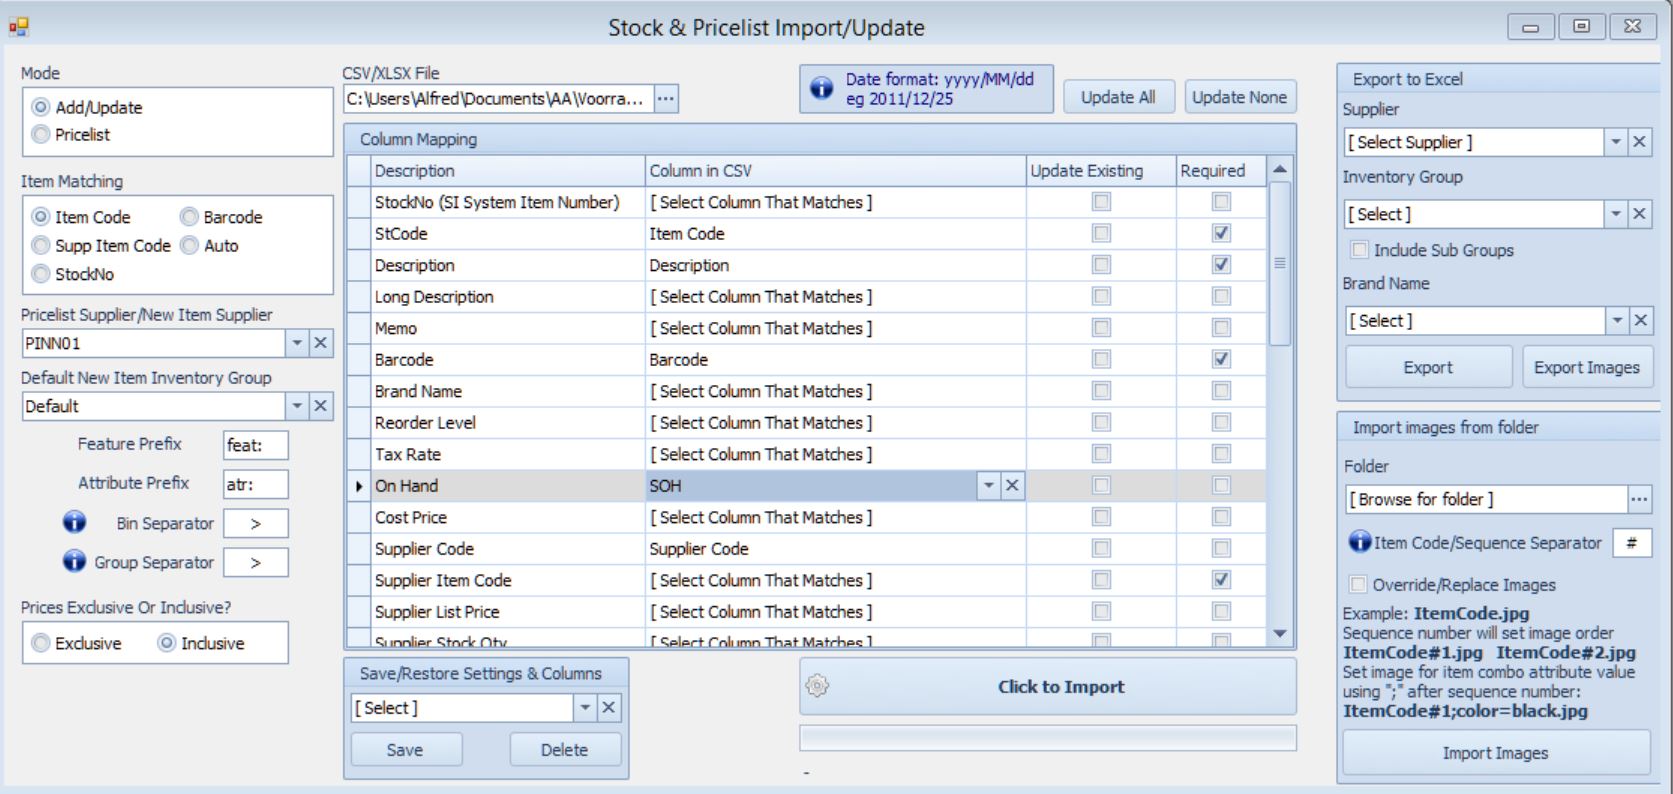
Stock & Price-list Import/Update
Use this form to add new stock items to the Stock Master Form or to update existing stock items.
The file being imported must be in CSV (Comma Delimited) or XLSX format.
Remember, before you save your Excel file as a CSV file, open your Control Panel in Windows and go to the Regional settings (Change date, time and number formats).Click on the Additional Settings button and make sure that the Decimal Symbol is a "." (point) and that the List Separator is a "," (comma). Do the same on the Currency tab.
1.0 Select the CSV / XLSX file you want to use..
Mode:
Choose between Add/Update or Price-list. Select price-list if you only want to update the prices, only the relevant fields pertaining to the price-list will be displayed
Item Matching:
Select the code you want to match against the stock master.
If you select Auto the program will try to match the codes in the following order, Stock number, Barcode, Item code and lastly the Supplier Code.
Defaults for new items.
Price-list Supplier / New Item Supplier
If it is a new item and If no Supplier is specified in the CSV/XLSX file, then it will default to this Supplier.
Default New Item Inventory Group
If it is a new item and you did not specify a stock group in the CSV/XLSX file, it will default to this Default Stock Group.
Group Separator ">" e.g. Computers>Motherboards. In this example Computers is the main inventory group and Motherboards are the sub inventory group. If the inventory group does not exist, then it will be added.
Bin Separator (see group separator)
Prices Exclusive Or Inclusive?
Select if the prices that you are importing are exclusive or inclusive of VAT.
Column Mapping
Select the rest of the columns as requested
The Update Existing Column is selected if the existing data needs to be updated.
Rule 1
An Item will be added to the database if the following conditions are true.
Stock code, BarCode and Supplier Code (Supplier specific) does not already exist in SI+.
Items will be added, irrelevant if checkboxes are checked or not.
If there is, for example 3 items in the CSV file with identical stock codes but different suppliers and inventory groups, then the last entry imported will be set as the preferred supplier and the last entry inventory group will be used. The other 2 will be added under Other Suppliers in the Stock Master Form
Prices are optional, but if this is populated, the following will occur:
If Prices 1 to 10 are populated, then the ![]() will be unchecked on the Stock Form and prices will be imported into the Price Exclusive/Inclusive row, depending on which one was selected, in the Stock Form.
will be unchecked on the Stock Form and prices will be imported into the Price Exclusive/Inclusive row, depending on which one was selected, in the Stock Form.
If only Price 1 and Price 10 are populated (rest are blank). ![]() the "use group pricing" will be unchecked and the rest of the prices (2 to 9) will be spread automatically between 1 (lowest price) and 10 (highest price).
the "use group pricing" will be unchecked and the rest of the prices (2 to 9) will be spread automatically between 1 (lowest price) and 10 (highest price).
If you do not want to import prices, leave the fields as they are.
Rule 2
If an item does exist, the Item Code (depending on your choice in Item Matching) will be used to determine if the stock item exists, then only the fields that you have selected by selecting the Update Existing Column will be updated.
(Stock code (supplier specific) must be the same in SI+ and the CSV file).
Export to Excel.
You can selectively export data by selecting, Supplier, Inventory Group (with or without Sub Groups) as well as a Brand Name
Select the Export button to start the process.
Data will be exported to My Documents > Smart-It. The folder will automatically open after the export.
If you want to export your images, Select the Export Images button. An images folder will be created in My Documents > Smart-It > Images. See example below.
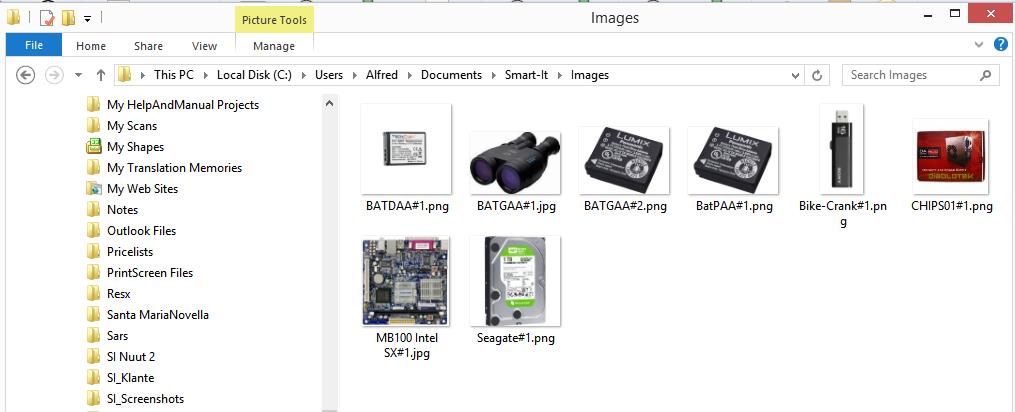
Import images from folder.
Use this option if you want to attach an image to an inventory item.
The name of the image must be the same as the Item Code, If the item has more than 1 image, then the next image name for the same item will be the same item code followed by a 2.