Add or Edit Branches |
Top Previous Next |
Go to: Company > Add or Edit Branches
Watch Tutorial: https://www.youtube.com/watch?v=7-oKUnmFcVE
Hover the mouse over the different menu options. If the cursor changes to a hand (![]() ), then click to go to the subject.
), then click to go to the subject.
![]()

![]()
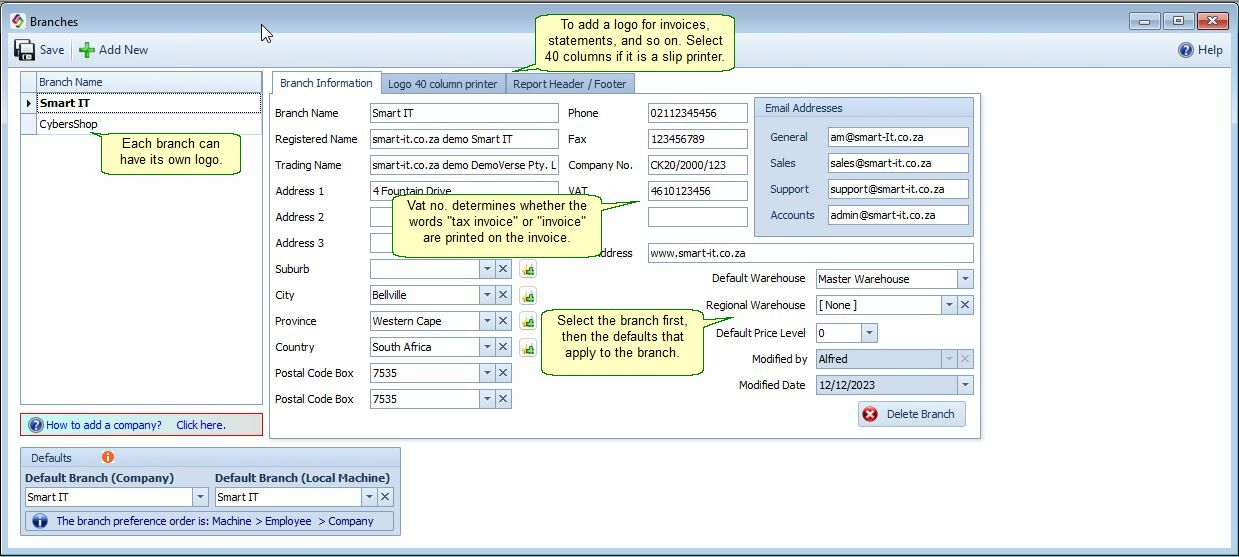
Add or Edit Company Branches

Fields Explained.
•Branch name
•Used as the branch code. Appears in GL Detail columns and lookup forms.
•Registered Name
•Legal name registered with authorities.
•Printed below the trading name on document headers.
•Trading Name
•Displayed above the registered name in headers.
![]() Note: If a Designed Header/Footer is used, it will override both the registered and trading names.
Note: If a Designed Header/Footer is used, it will override both the registered and trading names.
VAT Number & Invoice Type
•If VAT number is present → "Tax Invoice" is printed
•If not → just "Invoice" is printed
![]() Default Branch Selection.
Default Branch Selection.
The system determines which branch to use, for example in invoices, in the following order:
1. Local Machine Branch
2. Employee branch
3. Default Company Branch.
![]() Default Branch Per Employee
Default Branch Per Employee
•Go to: Employees > Add / Edit Employees.
•To auto-assign a customer to the employee’s branch:
→ Enable this in Customer Options > New Defaults.
![]() Related Settings:
Related Settings:
•Controls which price level or branch is used.
•Default Price Level
•Requires Pricing Type to be set to Branch Price Level
•Path: Customer > Financial Info > Pricing Type
•![]() Cash invoices always use this default.
Cash invoices always use this default.
![]() Reporting:
Reporting:
You can print individual income statements and trial balances per branch, or generate consolidated statements for all branches.
