Quick start |
Top Previous Next |
Quick Start Guide
1. Double-click the Smart-It icon on your desktop. ![]()
2. The login screen will appear:
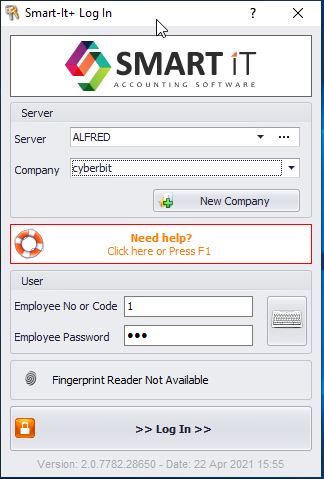
3. To explore the demo, click Log In.
•Demo password: 123
•Change it under Employees > Edit Employee
4. To start working, select your company database from the dropdown.
5. To create a new company, click New Company.
Company Setup Steps |
|
General Ledger (GL) accounts |
General Ledger (GL) Accounts•Go to Ledger > Account Setup to view or add accounts (e.g., salaries, fuel). •The system has a predefined chart of accounts, suitable for most businesses. •To change default GL accounts: •Ledger > Account Options > Account Defaults tab •To import accounts: •Ledger > Account Setup> Extra tab and select Import
|
Stock Groups |
Stock GroupsGo to Stock Items > Stock Groups. Each stock item links to a stock group. Groups determine Sales and Cost of Sales posting accounts.
|
Add Employees |
Go to Employee > Add Employee. Assign a security group and password for each user.
|
Add Customers |
•Go to Customer > New Customer •OR: Import via Customer > Extra > Customer Import •Export Outlook contacts (optional) to CSV and import them here.
•To enter opening balances: Go to Customer > Customer Journals •If you need to enter aged balances, obtain balances for each aging period you use. When entering opening balances, select the appropriate GL account—either Controls > Customer Opening Balances or the account recommended by your accountant for this purpose.
|
Add Suppliers |
•Go to Supplier > Lookup & Reconciliation and click on the Add Supplier button. •Enter opening balances at Supplier > Supplier Journals •Use Control Account: Supplier Opening Balances
|
Add Stock Items |
•Go to Stock Items > Stock Lookup and click on the Add New Stock button. •OR: Import via Stock > Stock Extra > Stock & Price List Import. •Then go to Stock Items > Stock Take to import stock quantities |
Point of Sale Setup |
•Go to Invoice > Invoice options •Set the message to display on invoices here.
|
Company information |
Go to Company > Add or Edit Branches
|
Document Messages You can create custom messages to display automatically on your invoices, statements, quotes, job cards, sales orders and more. To change or edit the messages. |
|
Invoice Message |
Go to Invoice > Invoice options Go to |
Quote Message |
Go to Quote > Quote Options |
Job Card Message |
Go to Workshop > Options |
Customer Statements |
|
Sales Order |
Go to Quote / Sales Order > Sales Order Options >Printing tab
|
Watch the Tutorial: Setting Up Custom Messages - Tutorial
Posting Opening Balances When setting up a new company, you'll need to post the opening balances for customers, suppliers, trial balance, and stock.
|
|
Customers at |
|
Suppliers at |
|
Trial balance at |
|
Stock and Cost Prices at |
Go to Stock > Stock Adjustment |
Tax System
Set your tax system at Ledger > Tax Setup